
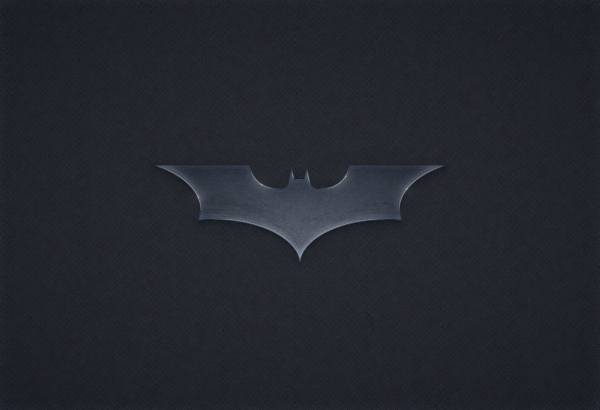
For starters you will learn how to setup a simple grid and how to create a a bunch of pixel perfect shape that will help you create the main logo shape. Using basic masking, blending and vector shape building techniques you will learn how to add some subtle highlights and texture. Taking full advantage of the Appearance panel you will learn how to add color, shading and more texture for your background and the logo shape. Finally, you will learn how to add several, tiny, glowing spots.
1. Create a New Document and Set Up a Grid
Hit Control-N to create a new document. Select Pixels from the Units drop-down menu, enter 600 in the width box and 410 in the height box then click on the Advanced button. Select RGB, Screen (72ppi) and make sure that the Align New Objects to Pixel Grid box is unchecked before you click OK.Enable the Grid (View > Show Grid) and the Snap to Grid (View > Snap to Grid). For starters you will need a grid every 5px, so simply go to Edit > Preferences > Guides > Grid, enter 5 in the Gridline every box and 1 in the Subdivisions box. Try not to get discouraged by all that grid, it will ease your work and keep in mind that you can easily enable or disable it using the Control-" keyboard shortcut. You should also open the Info panel (Window > Info) for a live preview with the size and position of your shapes. Do not forget to set the unit of measurement to pixels from Edit > Preferences > Units > General. All these options will significantly increase your work speed.

2. Create the Main Shape
Step 1
Pick the Rectangle Tool (M) and focus on your Toolbar. Remove the color from the stroke then select the fill and set its color at R=247 G=148 B=30. Move to your Artboard and simply create a 310 x 100px rectangle, the Snap to Grid should ease your work.
Step 2
Set the fill color at R=39 G=170 B=225, pick the Ellipse Tool (L) and create a 170 x 90px shape. Try to use the grid in the back as a reference and make sure that you're placing this new shape as shown in the first image. You can easily lower the Opacity of this blue shape if you wish to see the grid in the back. Make sure that your shape is selected, open the Transparency panel (Window > Transparency) and simply lower the Opacity to about 50%. Make sure that your blue shape is selected and make a copy in front (Control-F > Control-F). Select it and simply drag it 170px to the right as shown in the second image.
Step 3
Set the fill color at R=0 G=148 B=68, pick the Ellipse Tool (L), create a 175 x 100px shape and place it exactly as shown in the first image. Make sure that this new shape stays selected and go to Object > Transform > Move. Enter "375px" in the Horizontal box and simply click the Copy button. This should create a second green shape as shown in the second image.
Step 4
For this step you will need a grid every 1px, so go to Edit > Preferences > Guides & Grid and enter 1 in the Gridline every box. Set the fill color at R=127 G=63 B=152, pick the Rectangle Tool (M), create a 55 x 45px shape and place it exactly as shown in the following image.
Step 5
Focus on the bottom side of your purple rectangle and pick the Direct Selection Tool (A). Select the right anchor point and drag it 10px to the left then select the left anchor point and drag it 15px to the right and 5px up. In the end your purple shape should look like in the second image.
Step 6
Keep focusing on the bottom side of your purple shape and make sure that the Direct Selection Tool (A) is still active. Select the right anchor point (highlighted by the blue circle in the following image), move to the control panel, focus on the Corners section and simply enter "8px" in that white box.Next, select the left anchor point (highlighted by the green circle in the following image), get back to the Corners section from the control panel and enter "25px" in that white box. In the end your purple shape should look like in the second image.

Step 7
Reselect your purple shape and go to Effect > Distort & Transform > Transform. Check the Reflect X button, enter "1" in that Copies box, drag the Move-Horizontal slider at 60px and click OK. Make sure that your purple shape is still selected and go to Object > Expand Appearance. Select the resulting group of shapes simply hit Shift-Control-G to Ungroup it.
Step 8
Set the fill color at R=237 G=28 B=36, pick the Rectangle Tool (M), create a 17 x 15px shape and place it exactly as shown in the first image. Focus on the bottom side of this new rectangle and pick the Direct Selection Tool (A). Select the right anchor point and drag it 4px to the left then select the left anchor point and drag it 4px to the right. In the end your red shape should turn into a trapezoid as shown in the second image.
Step 9
Using the Ellipse Tool (L), create a 17 x 6px shape and place it exactly as shown in the first image. Select this squeezed circle along with your red trapezoid, open the Pathfinder panel (Window > Pathfinder) and click the Minus Front button.
Step 10
Reselect all the shapes made so far and simply click the Minus Front button from the Pathfinder panel. The resulting shape should look like in the second image. Move to the Layers panel, open the existing layer, simply double-click on your shape and rename it "logo".
3. Tweak Your Main Shape and Add a Simple Background
Step 1
Keep focusing on your "logo" shape, pick the Direct Selection Tool (A) and select the three anchor points highlighted in the first image. Go the Corners section from the control panel and simply enter "0.2px" in that white box.Continue with the Direct Selection Tool (A), select the four anchor points highlighted in the second image, return to the Corners section and enter "1px" in that white box.
Finally, select the two anchor points highlighted in the third image and enter "3px" in the Corners box.

Step 2
Pick the Rectangle Tool (M) and simply click on your artboard to open the Rectangle window. Enter 610 in the Width box and 420 in the Height box then click OK. Fill this new shape with R=67 G=71 B=82 then send it to back (Shift-Control-[ ).Next, you need to center this rectangle, so open the Align panel (Window > Align). Set the aligning to Artboard (open the fly out menu and go to Show Options if you can't see the Align To section as shown in the following image) then simply click the Horizontal Align Center and Vertical Align Center buttons. In the end your rectangle should cover the entire artboard as shown in the following image.
Move to the Layers and simply rename this new shape "background".

4. Add Subtle Highlights and a Texture for Your Main Shape
Step 1
Make sure that your "logo" shape is selected and go to Object > Path > Offset Path. Enter a -1px Offset and click OK. Select the resulting shape and focus on the Appearance panel (Window > Appearance). Remove the color from the fill then select the stroke and set its color at R=237 G=28 B=36.
Step 2
Keep focusing on your red path and pick the Direct Selection Tool (A). Select the eleven anchor points highlighted in the first image, simply hit the Delete button from your keyboard and you should end up with the seven red paths as shown in the second image.
Step 3
Focus on your bottom, red path and pick the Direct Selection Tool (A). Select the anchor point highlighted in the first image, move to the control panel and simply click on the Cut path button. This should cut your path in half.
Step 4
Reselect all your red paths and focus on the Appearance panel. Select the stroke, replace the existing color with white then simply click on that "Stroke" piece of text to open the Stroke fly-out panel. Set the Weight at 0.5px then move down to the Profile section, open that drop-down menu and select Width Profile 1.In the end things should look like in the first image. Make sure that all these paths are still selected and hit Control-G to Group them. Select this new group, focus on the Appearance panel, simply click on that "Opacity" piece of text to open the Transparency fly-out panel, and lower the Opacity to 35%.

Step 5
Make sure that your group of white paths is still selected and make a copy in front (Control-C > Control-F). Select this new group, focus on the Appearance panel, increase its Opacity to 80%, change the Blending Mode to Color Dodge and go to Effect > Blur > Gaussian Blur. Enter a 5px Radius and click OK.
Step 6
Next, you need to mask that blurred group of paths made in the previous step. Reselect your "logo" shape, make a copy in front (Control-C > Control-F), bring it to front (Shift-Control-] ) and replace the existing fill color with white (R=255 G=255 B=255). Select this new shape along with the blurred group of shapes , focus on the Transparency panel and simply click on that Make Opacity Mask button. In the end your masked group should look like in the third image.
Step 7
Disable the Snap to Grid (View > Snap to Grid) then go to Edit > Preferences > General and make sure that the Keyboard Increment is set at 1px. Select your "logo" shape and make two copies in front (Control-C > Control-F > Control-F). Select the top copy and move it 1px up using the up arrow button from your keyboard.Reselect both copies made in this step and click the Minus Front button from the Pathfinder panel. Make sure that the resulting group of shapes is selected and simply hit Control-8 to turn it into a simple Compound Path. Select it and focus on the Appearance panel. Set the fill color at black (R=0 G=0 B=0), lower its Opacity to 50% and change the Blending Mode to Soft Light.

Step 8
Reselect your "logo" shape and make a copy in front (Control-C > Control-F). Select this new shape and focus on the Appearance panel (Window > Appearance). Remove the color from the fill then select the stroke and set its color at R=237 G=28 B=36.Using the Direct Selection Tool (A), select the two anchor points highlighted in the first image, delete them and you will end up with two red paths. Select the top one and get rid of it.

Step 9
Focus on the remaining, red path. You will need a built-in brush for this path so open the Brushes panel (Window > Brushes). Open the fly-out menu and go to Open Brush Library > Artistic > Artistic_ChalkCharcoalPencil. Make sure that your red path is selected, simply replace that red stroke with the "Chalk" art brush, lower its Opacity to 20% and change the Blending Mode to Soft Light.
Step 10
Now you need to mask the path with that "Chalk" art brush. Reselect your "logo" shape, make a copy in front (Control-C > Control-F), bring it to front (Shift-Control-] ) and replace the existing fill color with white. Select this new shape along with the path and click on that Make Opacity Mask button from the Transparency panel. In the end your masked path should look like in the third image.
Step 11
Reselect your "logo" shape and go to Object > Path > Offset Path. Enter a -1px Offset and click OK. Make sure that your new shape is selected and make a copy in front (Control-C > Control-F). Select this copy and move it 5px up using the up arrow button from your keyboard.Reselect both shapes made in this step and click the Minus Front button from the Pathfinder panel. Turn the resulting group of shapes into a Compound Path (Control-8), set the fill color at R=190 G=197 B=207, lower its Opacity to 20% and change the Blending Mode to Soft Light.

5. Add Color, Shading and More Texture for Your Main Shape Using the Appearance Panel
Step 1
Make sure that your "logo" shape stays selected and focus on the Appearance panel. Select the fill, replace the existing color with R=190 G=197 B=207 and go to Effect > Stylize > Inner Glow. Enter the properties shown in the following image and click OK.
Step 2
Make sure that your "logo" shape stays selected, focus on the Appearance panel and add a second fill using the Add New Fill button (pointed by the blue circle in the following image). Select the fill, open the Gradient panel (Window > Gradient) and simply click on the gradient thumbnail to add the default black to white linear gradient.Keep focusing on your Gradient panel, select Radial from the Type drop-down menu then move to the gradient colors. Select the right slider and set the color at R=58 G=62 B=73 then select the left slider, add the same color and lower its Opacity to 0%. Make sure that the fill added in this step stays selected, focus on your artboard, pick the Gradient Tool (G) and stretch your gradient roughly as shown in the following image. Return to the Appearance panel, keep focusing on the fill added in this step and lower its Opacity to 50%. Keep in mind that the yellow zero from the Gradient image stands for Opacity percentage.

Step 3
Make sure that your "logo" shape stays selected, focus on the Appearance panel and add a third fill using that same Add New Fill button. Select this new fill, change its Blending Mode to Soft Light and add the radial gradient shown in the following image. Don't forget that the yellow zero from the Gradient image stands for Opacity percentage and use the Gradient Tool (G) to stretch this new gradient as shown in the following image.
Step 4
Make sure that your "logo" shape stays selected, focus on the Appearance panel and add a fourth fill. Select it, set the color at black, lower its Opacity to 30%, change the Blending Mode to Multiply and go to Effect > Artistic > Sponge. Enter the properties shown in the following image, click OK and go to Effect > Stylize > Feather. Enter a 5px Radius and click OK.
Step 5
Make sure that your "logo" shape stays selected, focus on the Appearance panel and add a fifth fill. Select it, set the color at black, lower its Opacity to 15%, change the Blending Mode to Multiply and go to Effect > Distort > Diffuse Glow. Enter the properties shown in the following image, click OK and go to Effect > Stylize > Feather. Enter a 5px Radius and click OK.
Step 6
Make sure that your "logo" shape stays selected, focus on the Appearance panel and add a sixth fill. Select it, set the color at R=47 G=51 B=62 and change the Blending Mode to Soft Light.
Step 7
Make sure that your "logo" shape stays selected, focus on the Appearance panel and select the stroke. Set the color at black, lower its Opacity to 30%, change the Blending Mode to Soft Light then open the Stroke fly-out panel. Make sure that the Weight is set at 1px and check the Align Stroke to Inside button.
Step 8
Make sure that your "logo" shape stays selected, focus on the Appearance panel, select the existing stroke and duplicate it using the Duplicate Selected Item button (pointed by the blue circle in the following image). Select the new stroke, lower its Opacity to 10%, replace the flat color with the linear gradient shown in the following image and go to Effect > Path > Offset Path. Enter a -1px Offset and click OK.
Step 9
Make sure that your "logo" shape stays selected, focus on the Appearance panel, select the bottom fill and go to Effect > Stylize > Drop Shadow. Enter the properties shown in the top, left window (in the following image), click OK then add the other four Drop Shadow effects shown in the following image.
Step 10
Make sure that your "logo" shape stays selected, focus on the Appearance panel and add a new fill using that same Add New Fill button. Drag this new fill in the bottom of the Appearance panel, lower its Opacity to 5%, change the Blending Mode to Soft Light and go to Effect > Path > Offset Path. Enter a 5px Offset, click OK and go to Effect > Blur > Gaussian Blur. Enter a 25px Radius and click OK.
6. Add Color and Textures For the Background Shape
Step 1
Make sure that your "background" shape stays selected, focus on the Appearance panel and add a second fill. Select it, set the color at black, lower its Opacity to 30%, change the Blending Mode to Multiply and go to Effect > Artistic > Sponge. Enter the properties shown in the following image and click OK.
Step 2
Make sure that your "background" shape stays selected, focus on the Appearance panel and add a third fill. Select it, set the color at black, lower its Opacity to 20%, change the Blending Mode to Soft Light and go to Effect > Distort > Diffuse Glow. Enter the properties shown in the following image and click OK.
Step 3
Make sure that your "background" shape stays selected, focus on the Appearance panel and add a fourth fill. You will need a built-in pattern for this new fill, so go to the Swatches panel, open the fly-out menu and go to Open Swatch Library > Patterns > Basic Graphics > Basic Graphics_Textures. A new window with a set of built-in patterns should open. Make sure that the fill added in this step is still selected, add the "Diamond" pattern, lower its opacity to 15%, change the Blending Mode to Multiply and go to Effect > Artistic > Film Grain. Enter the properties shown below and click OK.
Step 4
Make sure that your "background" shape stays selected, focus on the Appearance panel and add a fifth fill. Select this new fill, lower its Opacity to 50%, change the Blending Mode to Soft Light and add the radial gradient shown in the following image. Don't forget that the yellow zero from the Gradient image stands for Opacity percentage.
7. Add Tiny Glowing Spots
Step 1
Using the Ellipse Tool (L), create a 4px circle and set the fill color at white. Make sure that this tiny shape stays selected and focus on the Appearance panel. Select the existing fill, lower its Opacity to 30%, change the Blending Mode to Overlay and go to Effect > Distort & Transform > Pucker & Bloat. Drag the slider at -75% and click OK.
Step 2
Make sure that your white circle stays selected, focus on the Appearance panel and add a second fill. Select this new fill, drag it in the bottom of the Appearance panel and make sure that the fill color is set at white. Lower its Opacity to 50%, change the Blending Mode to Color Dodge and go to Effect > Blur > Gaussian Blur. Enter a 5px Radius and click OK. Make sure that your tiny circle is still selected, open the Graphic Styles panel (Window > Graphic Styles) and simply click on the New Graphic Style button to save a new graphic style. Once you're done you can get rid of that tiny circle.Step 3
Using the Ellipse Tool (L), create two, 3px circles and two, 4px circles, set their fill color at white and place them roughly as shown in the first image. Make sure that all four shapes are select and simply add your graphic style from the Graphic Styles panel.
Congratulations! You're Done!
Here is how it should look. I hope you've enjoyed this tutorial and can apply these techniques in your future projects.by. design.tutsplus.com


